通常,實時物理模擬代碼是用低級 CUDA C ++編寫的,以獲得最佳性能。在這篇文章中,我們將介紹 NVIDIA Warp ,這是一個新的 Python 框架,可以輕松地用 Python 編寫可微圖形和模擬 GPU 代碼。 Warp 提供了編寫高性能仿真代碼所需的構建塊,但它的工作效率與 Python 等解釋語言相當。
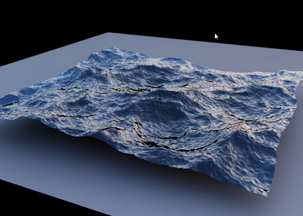
在這篇文章的最后,您將學習如何使用 Warp 在 Python 環境中編寫 CUDA 內核,并利用一些內置的高級功能,從而輕松編寫復雜的物理模擬,例如海洋模擬(圖 1 )。
安裝
Warp 以 來自 GitHub 的開源庫 的形式提供。克隆存儲庫后,可以使用本地軟件包管理器進行安裝。對于 pip ,請使用以下命令:
pip install warp
初始化
導入后,必須顯式初始化扭曲:
import warp as wp
wp.init()
推出內核
Warp 使用 Python 裝飾器的概念來標記可以在 GPU 上執行的函數。例如,可以編寫一個簡單的半隱式粒子積分方案,如下所示:
@wp.kernel
def integrate(x: wp.array(dtype=wp.vec3), v: wp.array(dtype=wp.vec3), f: wp.array(dtype=wp.vec3), w: wp.array(dtype=float), gravity: wp.vec3, dt: float): # thread id tid = wp.tid() x0 = x[tid] v0 = v[tid] # Semi-implicit Euler step f_ext = f[tid] inv_mass = w[tid] v1 = v0 + (f_ext * inv_mass + gravity) * dt x1 = x0 + v1 * dt # store results x[tid] = x1 v[tid] = v1
因為 Warp 是強類型的,所以應該為內核參數提供類型提示。要啟動內核,請使用以下語法:
wp.launch(kernel=simple_kernel, # kernel to launch dim=1024, # number of threads inputs=[a, b, c], # parameters device="cuda") # execution device
與 NumPy 等基于張量的框架不同, Warp 使用 kernel-based 編程模型。基于內核的編程與底層 GPU 執行模型更為匹配。對于需要細粒度條件邏輯和內存操作的模擬代碼,這通常是一種更自然的表達方式。然而, Warp 以一種易于使用的方式公開了這種以線程為中心的編程模型,它不需要 GPU 體系結構的低級知識。
編譯模型
啟動內核會觸發實時( JIT )編譯管道,該管道會自動從 Python 函數定義生成 C ++/ CUDA 內核代碼。
屬于 Python 模塊的所有內核都在運行時編譯到動態庫和 PTX 中。圖 2 。顯示了編譯管道,其中包括遍歷函數 AST 并將其轉換為直線 CUDA 代碼,然后編譯并加載回 Python 進程。
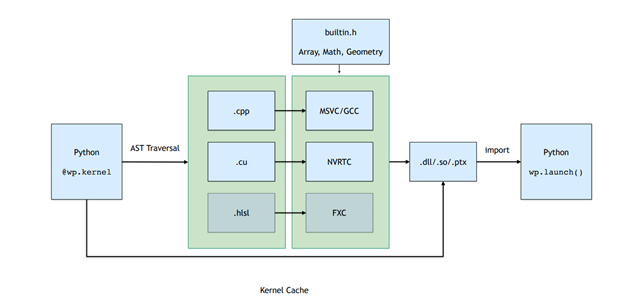
這個 JIT 編譯的結果被緩存。如果輸入內核源代碼不變,那么預編譯的二進制文件將以低開銷的方式加載。
記憶模型
Warp 中的內存分配通過warp.array類型公開。陣列封裝了可能位于主機( CPU )或設備( GPU )內存中的底層內存分配。與張量框架不同, Warp 中的數組是強類型的,并存儲內置結構的線性序列(vec3, matrix33, quat,等等)。
您可以從 Python 列表或 NumPy 數組中構造數組,或使用與 NumPy 和 PyTorch 類似的語法進行初始化:
# allocate an uninitizalized array of vec3s v = wp.empty(length=n, dtype=wp.vec3, device="cuda") # allocate a zero-initialized array of quaternions q = wp.zeros(length=n, dtype=wp.quat, device="cuda") # allocate and initialize an array from a numpy array # will be automatically transferred to the specified device v = wp.from_numpy(array, dtype=wp.vec3, device="cuda")
Warp 支持__array_interface__和__cuda_array_interface__協議,允許在基于張量的框架之間進行零拷貝數據視圖。例如,要將數據轉換為 NumPy ,請使用以下命令:
# automatically bring data from device back to host view = device_array.numpy()
特征
Warp 包含幾個更高級別的數據結構,使實現模擬和幾何處理算法更容易。
網格
三角形網格在仿真和計算機圖形學中無處不在。 Warp 提供了一種內置類型,用于管理網格數據,該數據支持幾何查詢,例如最近點、光線投射和重疊檢查。
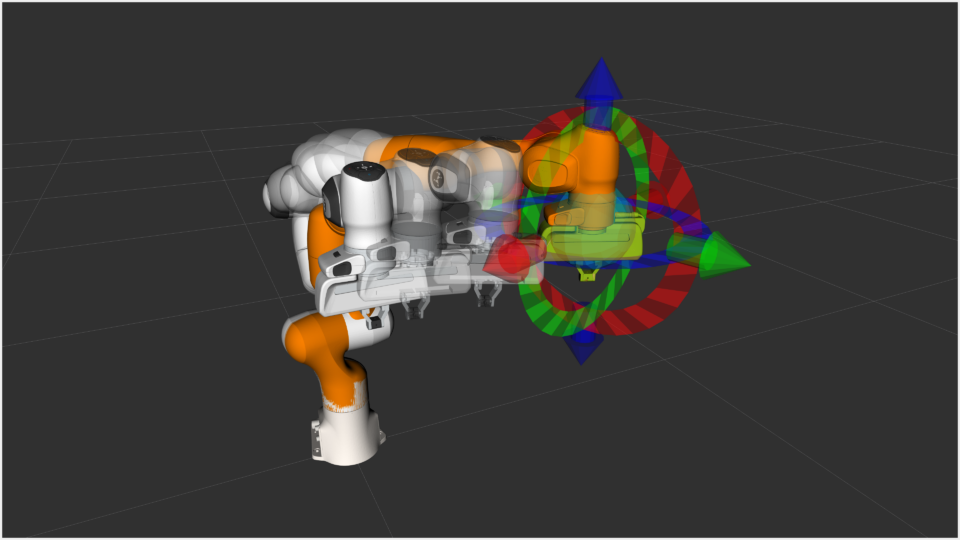
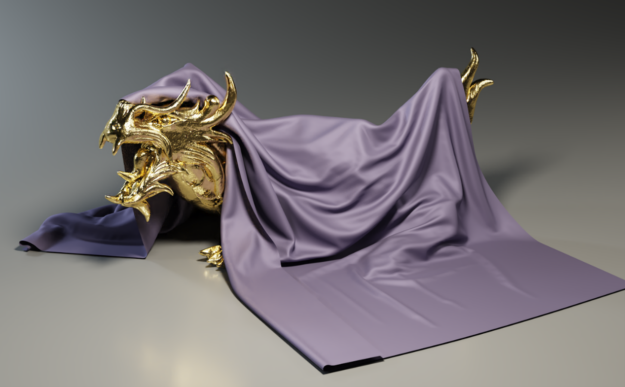
下面的示例演示如何使用“扭曲”計算網格上距離輸入位置數組最近的點。這種類型的計算是碰撞檢測中許多算法的基礎(圖 3 )。 Warp 的網格查詢使實現此類方法變得簡單。
@wp.kernel
def project(positions: wp.array(dtype=wp.vec3), mesh: wp.uint64, output_pos: wp.array(dtype=wp.vec3), output_face: wp.array(dtype=int)): tid = wp.tid() x = wp.load(positions, tid) face_index = int(0) face_u = float(0.0) face_v = float(0.0) sign = float(0.0) max_dist = 2.0 if (wp.mesh_query_point(mesh, x, max_dist, sign, face_index, face_u, face_v)): p = wp.mesh_eval_position(mesh, face_index, face_u, face_v) output_pos[tid] = p output_face[tid] = face_index
稀疏卷
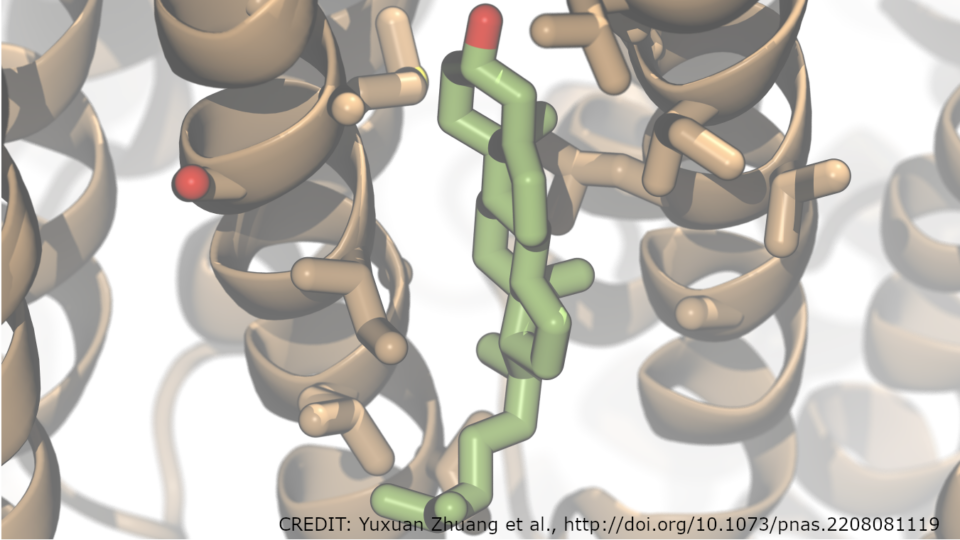
稀疏體對于表示大型域上的網格數據非常有用,例如復雜對象的符號距離場( SDF )或大規模流體流動的速度。 Warp 支持使用 NanoVDB 標準定義的稀疏卷。使用標準 OpenVDB 工具(如 Blender 、 Houdini 或 Maya )構造卷,然后在 Warp 內核內部采樣。
您可以直接從磁盤或內存中的二進制網格文件創建卷,然后使用volumes API 對其進行采樣:
wp.volume_sample_world(vol, xyz, mode) # world space sample using interpolation mode
wp.volume_sample_local(vol, uvw, mode) # volume space sample using interpolation mode
wp.volume_lookup(vol, ijk) # direct voxel lookup
wp.volume_transform(vol, xyz) # map point from voxel space to world space
wp.volume_transform_inv(vol, xyz) # map point from world space to volume space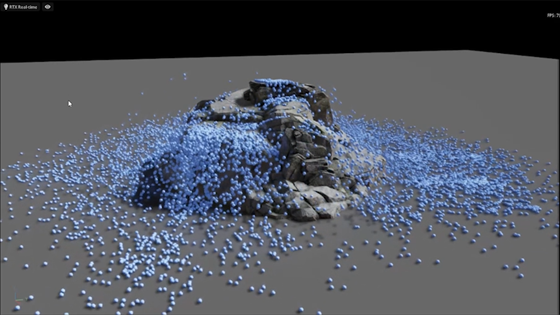
使用卷查詢,您可以以最小的內存開銷高效地碰撞復雜對象。
散列網格
許多基于粒子的模擬方法,如離散元法( DEM )或平滑粒子流體動力學( SPH ),都涉及到在空間鄰域上迭代以計算力的相互作用。哈希網格是一種成熟的數據結構,用于加速這些最近鄰查詢,特別適合 GPU 。
哈希網格由點集構成,如下所示:
grid = wp.HashGrid(dim_x=128, dim_y=128, dim_z=128, device="cuda")
grid.build(points=p, radius=r)
創建散列網格后,可以直接從用戶內核代碼中查詢它們,如以下示例所示,該示例計算所有相鄰粒子位置的總和:
@wp.kernel
def sum(grid : wp.uint64, points: wp.array(dtype=wp.vec3), output: wp.array(dtype=wp.vec3), radius: float): tid = wp.tid() # query point p = points[tid] # create grid query around point query = wp.hash_grid_query(grid, p, radius) index = int(0) sum = wp.vec3() while(wp.hash_grid_query_next(query, index)): neighbor = points[index] # compute distance to neighbor point dist = wp.length(p-neighbor) if (dist <= radius): sum += neighbor output[tid] = sum
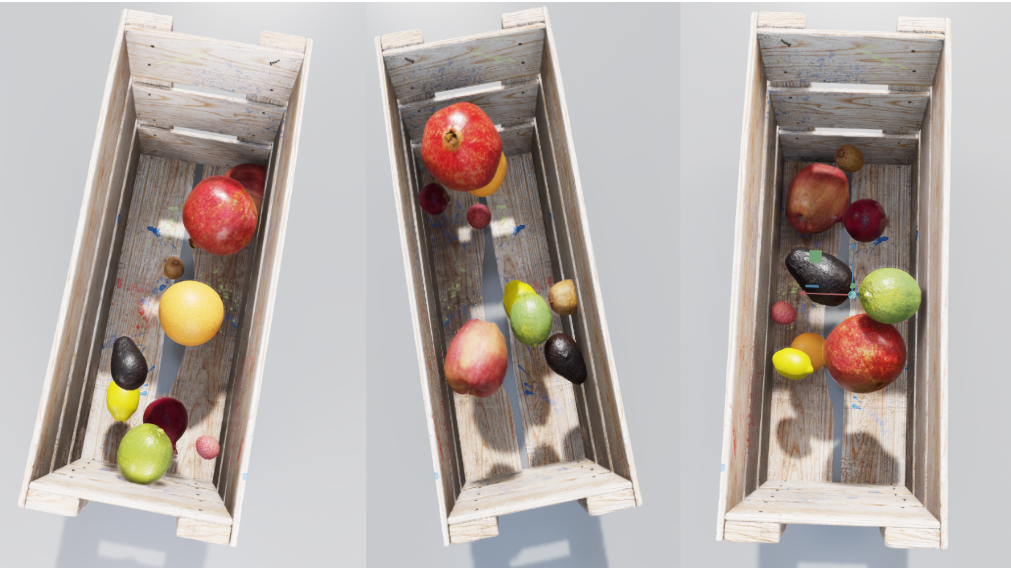
圖 5 顯示了粘性材料的 DEM 顆粒材料模擬示例。使用內置的哈希網格數據結構,您可以在不到 200 行 Python 中編寫這樣的模擬,并以交互速率運行超過 100K 個粒子。
使用扭曲散列網格數據可以輕松評估相鄰粒子之間的成對力相互作用。
可微性
基于張量的框架,如 PyTorch 和 JAX ,提供了張量計算的梯度,非常適合于 ML 訓練等應用。
Warp 的一個獨特功能是能夠生成 kernel code 的正向和反向版本。這使得編寫可微模擬變得很容易,可以將梯度作為更大訓練管道的一部分進行傳播。一個常見的場景是,對網絡層使用傳統的 ML 框架,并使用 Warp 實現允許端到端差異性的模擬層。
當需要漸變時,應使用requires_grad=True創建陣列。例如,warp.Tape類可以記錄內核啟動并回放它們,以計算標量損失函數相對于內核輸入的梯度:
tape = wp.Tape() # forward pass
with tape: wp.launch(kernel=compute1, inputs=[a, b], device="cuda") wp.launch(kernel=compute2, inputs=[c, d], device="cuda") wp.launch(kernel=loss, inputs=[d, l], device="cuda") # reverse pass
tape.backward(loss=l)
完成后向傳遞后,可通過Tape對象中的映射獲得與輸入相關的梯度:
# gradient of loss with respect to input a
print(tape.gradients[a])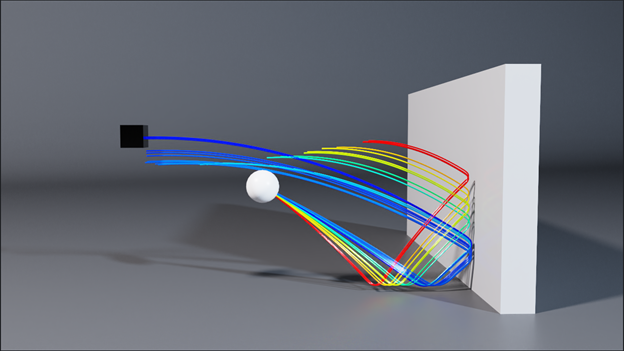
總結
在這篇文章中,我們介紹了 NVIDIA Warp ,這是一個 Python 框架,可以很容易地為 GPU 編寫可微模擬代碼。我們鼓勵您下載 Warp 預覽版,分享結果,并給我們反饋。
有關更多信息,請參閱以下參考資料:
- Warp 產品頁面
- NVIDIA/warp GitHub 回購
- Warp documentation
- Warp: GPU 模擬和圖形的高性能 Python 框架 GTC 會議
- 用于學習和機器人學的可微物理模擬 GTC 會議( PDF )
?