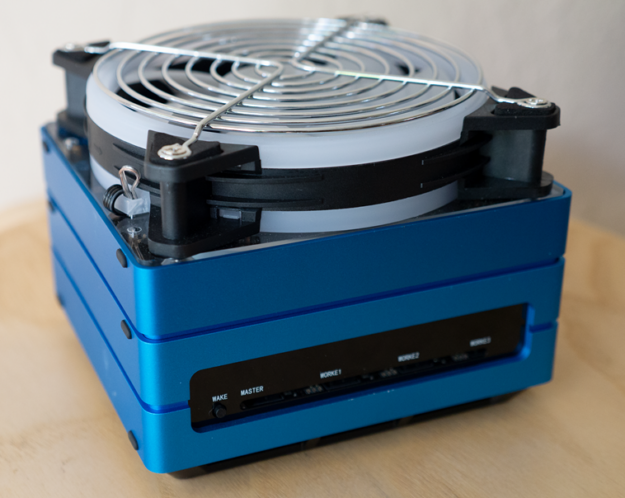
Following in the footsteps of large-scale supercomputers like the NVIDIA DGX SuperPOD, this post guides you through the process of creating a small-scale cluster that fits on your desk. Below is the recommended hardware and software to complete this project. This small-scale cluster can be utilized to accelerate training and inference of artificial intelligence (AI) and deep learning (DL) workflows, including the use of containerized environments from sources such as the NVIDIA NGC Catalog.
Hardware:

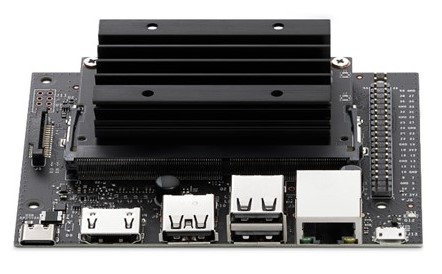
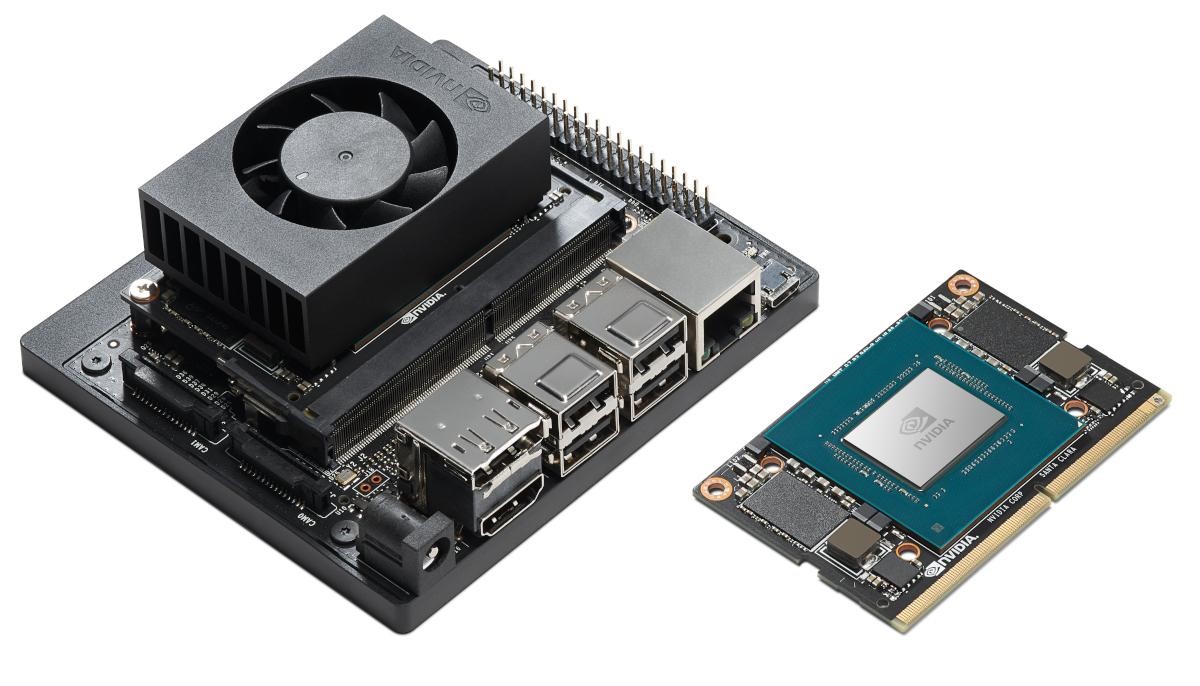
- 4x NVIDIA Jetson Xavier NX Dev Kits
- 4x MicroSD Cards (128GB+)
- 1x SD+microSD Card Reader
- 1x (Optional) Seeed Studio Jetson Mate Cluster Mini
- 1x (Optional) USB-C PD Power Supply (90w+)
- 1x (Optional) USB-C PD 100w Power Cable
While the Seeed Studio Jetson Mate, USB-C PD power supply, and USB-C cable are not required, they were used in this post and are highly recommended for a neat and compact desktop cluster solution.
Software:
For more information, see the NVIDIA Jetson Xavier NX development kit.
Installation
Write the JetPack image to a microSD card and perform initial JetPack configuration steps:
The first iteration through this post is targeted toward the Slurm control node (slurm-control). After you have the first node configured, you can either choose to repeat each step for each module, or you can clone this first microSD card for the other modules; more detail on this later.
For more information about the flashing and initial setup of JetPack, see Getting Started with Jetson Xavier NX Developer Kit.
While following the getting started guide above:
- Skip the wireless network setup portion as a wired connection will be used.
- When selecting a username and password, choose what you like and keep it consistent across all nodes.
- Set the computer’s name to be the target node you’re currently working with, the first being
slurm-control. - When prompted to select a value for Nvpmodel Mode, choose
MODE_20W_6COREfor maximum performance.
After flashing and completing the getting started guide, run the following commands:
echo "`id -nu` ALL=(ALL) NOPASSWD: ALL" | sudo tee /etc/sudoers.d/`id -nu`
sudo systemctl mask snapd.service apt-daily.service apt-daily-upgrade.service
sudo systemctl mask apt-daily.timer apt-daily-upgrade.timer
sudo apt update
sudo apt upgrade -y
sudo apt autoremove -y
Disable NetworkManager, enable systemd-networkd, and configure network [DHCP]:
sudo systemctl disable NetworkManager.service NetworkManager-wait-online.service NetworkManager-dispatcher.service network-manager.service
sudo systemctl mask avahi-daemon
sudo systemctl enable systemd-networkd
sudo ln -sf /run/systemd/resolve/stub-resolv.conf /etc/resolv.conf
cat << EOF | sudo tee /etc/systemd/network/eth0.network > /dev/null

[Match]
Name=eth0

[Network]
DHCP=ipv4
MulticastDNS=yes

[DHCP]
UseHostname=false
UseDomains=false
EOF

sudo sed -i "/#MulticastDNS=/c\MulticastDNS=yes" /etc/systemd/resolved.conf
sudo sed -i "/#Domains=/c\Domains=local" /etc/systemd/resolved.conf
Configure the node hostname:
If you have already set the hostname in the initial JetPack setup, this step can be skipped.
[slurm-control]
sudo hostnamectl set-hostname slurm-control
sudo sed -i "s/127\.0\.1\.1.*/127\.0\.1\.1\t`hostname`/" /etc/hosts
[compute-node]
Compute nodes should follow a particular naming convention to be easily addressable by Slurm. Use a consistent identifier followed by a sequentially incrementing number (for example, node1, node2, and so on). In this post, I suggest using nx1, nx2, and nx3 for the compute nodes. However, you can choose anything that follows a similar convention.
sudo hostnamectl set-hostname nx[1-3]
sudo sed -i "s/127\.0\.1\.1.*/127\.0\.1\.1\t`hostname`/" /etc/hosts
Create users and groups for Munge and Slurm:
sudo groupadd -g 1001 munge
sudo useradd -m -c "MUNGE" -d /var/lib/munge -u 1001 -g munge -s /sbin/nologin munge
sudo groupadd -g 1002 slurm
sudo useradd -m -c "SLURM workload manager" -d /var/lib/slurm -u 1002 -g slurm -s /bin/bash slurm
Install Munge:
sudo apt install libssl-dev -y
git clone https://github.com/dun/munge
cd munge
./bootstrap
./configure
sudo make install -j6
sudo ldconfig
sudo mkdir -m0755 -pv /usr/local/var/run/munge
sudo chown -R munge: /usr/local/etc/munge /usr/local/var/run/munge /usr/local/var/log/munge
Create or copy the Munge encryption keys:
[slurm-control]
sudo -u munge mungekey --verbose
[compute-node]
sudo sftp -s 'sudo /usr/lib/openssh/sftp-server' `id -nu`@slurm-control <<exit
get /etc/munge/munge.key /etc/munge
exit

sudo chown munge: /etc/munge/munge.key
Start Munge and test the local installation:
sudo systemctl enable munge
sudo systemctl start munge
munge -n | unmunge
Expected result: STATUS: Success (0)
Verify that the Munge encryption keys match from a compute node to slurm-control:
[compute-node]
munge -n | ssh slurm-control unmunge
Expected result: STATUS: Success (0)
Install Slurm (20.11.9):
cd ~
wget https://download.schedmd.com/slurm/slurm-20.11-latest.tar.bz2
tar -xjvf slurm-20.11-latest.tar.bz2
cd slurm-20.11.9
./configure --prefix=/usr/local
sudo make install -j6
Index the Slurm shared objects and copy the systemd service files:
sudo ldconfig -n /usr/local/lib/slurm
sudo cp etc/*.service /lib/systemd/system
Create directories for Slurm and apply permissions:
sudo mkdir -pv /usr/local/var/{log,run,spool} /usr/local/var/spool/{slurmctld,slurmd}
sudo chown slurm:root /usr/local/var/spool/slurm*
sudo chmod 0744 /usr/local/var/spool/slurm*
Create a Slurm configuration file for all nodes:
For this step, you can follow the included commands and use the following configuration file for the cluster (recommended). To customize variables related to Slurm, use the configuration tool.
cat << EOF | sudo tee /usr/local/etc/slurm.conf > /dev/null
#slurm.conf for all nodes#
ClusterName=SlurmNX
SlurmctldHost=slurm-control
MpiDefault=none
ProctrackType=proctrack/pgid
ReturnToService=2
SlurmctldPidFile=/usr/local/var/run/slurmctld.pid
SlurmctldPort=6817
SlurmdPidFile=/usr/local/var/run/slurmd.pid
SlurmdPort=6818
SlurmdSpoolDir=/usr/local/var/spool/slurmd
SlurmUser=slurm
StateSaveLocation=/usr/local/var/spool/slurmctld
SwitchType=switch/none
InactiveLimit=0
KillWait=30
MinJobAge=300
SlurmctldTimeout=120
SlurmdTimeout=300
Waittime=0
SchedulerType=sched/backfill
SelectType=select/cons_tres
SelectTypeParameters=CR_Core_Memory
JobCompType=jobcomp/none
SlurmctldDebug=info
SlurmctldLogFile=/usr/local/var/log/slurmctld.log
SlurmdDebug=info
SlurmdLogFile=/usr/local/var/log/slurmd.log

NodeName=nx[1-3] RealMemory=7000 Sockets=1 CoresPerSocket=6 ThreadsPerCore=1 State=UNKNOWN
PartitionName=compute Nodes=ALL Default=YES MaxTime=INFINITE State=UP

EOF
sudo chmod 0744 /usr/local/etc/slurm.conf
sudo chown slurm: /usr/local/etc/slurm.conf
Install Enroot 3.3.1:
cd ~
sudo apt install curl jq parallel zstd -y
arch=$(dpkg --print-architecture)curl -fSsL -O https://github.com/NVIDIA/enroot/releases/download/v3.3.1/enroot_3.3.1-1_${arch}.deb
sudo dpkg -i enroot_3.3.1-1_${arch}.deb
Install Pyxis (0.13):
git clone https://github.com/NVIDIA/pyxis
cd pyxis
sudo make install -j6
Create the Pyxis plug-in directory and config file:
sudo mkdir /usr/local/etc/plugstack.conf.d
echo "include /usr/local/etc/plugstack.conf.d/*" | sudo tee /usr/local/etc/plugstack.conf > /dev/null
Link the Pyxis default config file to the plug-in directory:
sudo ln -s /usr/local/share/pyxis/pyxis.conf /usr/local/etc/plugstack.conf.d/pyxis.conf
Verify Enroot/Pyxis installation success:
srun --help | grep container-image
Expected result: --container-image=[USER@][REGISTRY#]IMAGE[:TAG]|PATH
Finalization
When replicating the configuration across the remaining nodes, label the JetsonNX modules with the assigned node name and/or the microSD cards. This helps prevent confusion later on when moving modules or cards around.
There are two different methods in which you can replicate your installation to the remaining modules: manual configuration or cloning slurm-control. Read over both methods and choose which method you prefer.
Manually configure the remaining nodes
Follow the “Enable and start the Slurm service daemon” section below for your current module, then repeat the entire process for the remaining modules, skipping any steps tagged under [slurm-control]. When all modules are fully configured, install them into the Jetson Mate in their respective slots, as outlined in the “Install all Jetson Xavier NX modules into the enclosure” section.
Clone slurm-control installation for remaining nodes
To avoid repeating all installation steps for each node, clone the slurm-control node’s card as a base image and flash it onto all remaining cards. This requires a microSD-to-SD card adapter if you have only one multi-port card reader and want to do card-to-card cloning. Alternatively, creating an image file from the source slurm-control card onto the local machine and then flashing target cards is also an option.
- Shut down the Jetson that you’ve been working with, remove the microSD card from the module, and insert it into the card reader.
- If you’re performing a physical card to card clone (using Balena Etcher, dd, or any other utility that will do sector by sector writes), insert the blank target microSD into the SD card adapter, then insert it into the card reader.
- Identify which card is which for the source (microSD) and destination (SD card) in the application that you’re using and start the cloning process.
- If you are creating an image file, using a utility of your choice, create an image file from the
slurm-controlmicroSD card on the local machine, then remove that card and flash the remaining blank cards using that image. - After cloning is completed, insert a cloned card into a Jetson module and power on. Configure the node hostname for a compute node, then proceed to enable and start the Slurm service daemon. Repeat this process for all remaining card/module pairs.
Enable and start the Slurm service daemon:
[slurm-control]
sudo systemctl enable slurmctld
sudo systemctl start slurmctld
[compute-node]
sudo systemctl enable slurmd
sudo systemctl start slurmd
Install all Jetson Xavier NX modules into the enclosure
First power down any running modules, then remove them from their carriers. Install all Jetson modules into the Seeed Studio Jetson Mate, ensuring that the control node is placed in the primary slot labeled “MASTER”, and compute nodes 1-3 are placed in secondary slots labeled “WORKE 1, 2, and 3” respectively. Optional fan extension cables are available from the Jetson Mate kit for each module.
The video output on the enclosure is connected to the primary module slot, as is the vertical USB2 port, and USB3 port 1. All other USB ports are wired to the other modules according to their respective port numbers.

Troubleshooting
This section contains some helpful commands to assist in troubleshooting common networking and Slurm-related issues.
Test network configuration and connectivity
The following command should show eth0 in the routable state, with IP address information obtained from the DHCP server:
networkctl status
The command should respond with the local node’s hostname and .local as the domain (for example, slurm-control.local), along with DHCP assigned IP addresses:
host `hostname`
Choose a compute node hostname that is configured and online. It should respond similarly to the previous command. For example: host nx1 – nx1.local has address 192.168.0.1. This should also work for any other host that has an mDNS resolver daemon running on your LAN.
host [compute-node-hostname]
All cluster nodes should be pingable by all other nodes, and all local LAN IP addresses should be pingable as well, such as your router.
ping [compute-node-hostname/local-network-host/ip]
Test the external DNS name resolution and confirm that routing to the internet is functional:
ping www.nvidia.com
Check Slurm cluster status and node communication
The following command shows the current status of the cluster, including node states:
sinfo -lNe
If any nodes in the sinfo output show UNKNOWN or DOWN for their state, the following command signals to the specified nodes to change their state and become available for job scheduling ([ ] specifies a range of numbers following the hostname ‘nx’):
scontrol update NodeName=hostname[1-3] State=RESUME
The following command runs hostname on all available compute nodes. Nodes should respond back with their corresponding hostname in your console.
srun -N3 hostname
Summary
You’ve now successfully built a multi-node Slurm cluster that fits on your desk. There’s a vast amount of benchmarks, projects, workloads, and containers that you can now run on your mini-cluster. Feel free to share your feedback on this post and, of course, anything that your new cluster is being used for.
Power on and enjoy Slurm!
For more information, see the following resources:
Acknowledgments
Special thanks to Robert Sohigian, a technical marketing engineer on our team, for all the guidance in creating this post, providing feedback on the clarity of instructions, and for being the lab rat in multiple runs of building this cluster. Your feedback was invaluable and made this post what it is!


